Go to Blogger edit html and find these sentences.Now replace these sentences with your own descriptions.This theme is Bloggerized by Lasantha Bandara - Premiumbloggertemplates.com.
Go to Blogger edit html and find these sentences.Now replace these sentences with your own descriptions.This theme is Bloggerized by Lasantha Bandara - Premiumbloggertemplates.com.
Go to Blogger edit html and find these sentences.Now replace these sentences with your own descriptions.This theme is Bloggerized by Lasantha Bandara - Premiumbloggertemplates.com.
Go to Blogger edit html and find these sentences.Now replace these sentences with your own descriptions.This theme is Bloggerized by Lasantha Bandara - Premiumbloggertemplates.com.
Go to Blogger edit html and find these sentences.Now replace these sentences with your own descriptions.This theme is Bloggerized by Lasantha Bandara - Premiumbloggertemplates.com.
Check your Samsung Galaxy S22 for a big update right now
Samsung is finally fulfilling its promise in the post-Galaxy S24 launch era. The company, via an official newsroom post, has confirmed that the generative AI tricks that made its latest flagship phones stand out are now rolling out for the two-generation-old Galaxy S22 series phones.
The AI-loaded One UI 6.1 update is now going out in batches for U.S. users of the Galaxy S22 and several foldable phones, including the Galaxy Z Flip 4 and Galaxy Z Fold 4 In addition to phones, Samsung has also released a build for the Galaxy Tab S8 line.
The new AI features certainly add a whole new level of convenience to the aforementioned phones, but there’s a caveat. These Galaxy AI tricks will only be free to use until sometime next year. After that, Samsung will start charging a fee, but we don’t know just how much it is going to be. Also, for features like Live Translate, you will need to create a Samsung account if you don’t already have one.
Among the most notable One UI 6.1 additions is Circle to Search. It’s my personal favorite, as it removes the whole chore of copy-and-pasting and/or launching a dedicated Google Lens search in a separate app. All you need to do is circle or draw around an object on the screen, and the internet-connected AI will find relevant information on it, including product listings.
Another cool addition is the photo-editing toolkit. It lets users select and move an object in a picture, enlarge or adjust the angle, and even automatically give post-analysis edit suggestions. It also lets you play with the background, add a splash of tonal hues, or have a great time with exposure effects, among other things.
On the more practical side, you have Live Translate, which can translate both voice and text during video calls. On foldable phones, the experience is even more rewarding with a split-screen approach. On a similar note, there’s Chat Assist, which offers translations and a tonal adjustment facility.
For folks struggling with a horde of disorderly notes, there’s the aptly named Note Assist. It can neatly organize haphazard notes into beautifully formatted versions, complete with its own automatic summarization and translation facility in tow. Notably, this one also requires a Samsung account and limits users to notes with up to 4,000 characters per note.
If you’re a Samsung loyalist still rocking the Galaxy S21, Galaxy Z Flip 3, or Galaxy Z Fold 3, the One UI 6.1 update will sprinkle in some AI goodies as well. These phones will be treated to Chat Assist and Circle to Search features, says Samsung, but the other AI features are reserved for newer phones.
Summer is for action, and while The Fall Guy didn’t exactly heat up the box office last weekend, Hulu‘s got plenty of excitement for action fans streaming at home. The ability to draw upon 20th Century Studios’ library and borrow films from other studios means that Hulu is never without some top-tier action flicks.
Our picks for the three action movies that you need to watch in May include a modern sequel to an aging franchise, one of Dwayne Johnson’s first movies, and the very best Die Hard movie that wasn’t the original film.
Bad Boys for Life (2020)
For a franchise that hadn’t gotten a sequel in 17 years, Bad Boys for Life managed to inject the third team-up of Will Smith and Martin Lawrence with a lot of excitement. Given the long stretch of time between Bad Boys 2 and this film, Detective Lieutenant Marcus Burnett (Lawrence) is ready to hang up his badge, much to the chagrin of his partner, Detective Lieutenant Mike Lowrey (Smith).
The Rundown (2003)
Very early in his acting career, Dwayne “The Rock” Johnson co-headlinedThe Rundown opposite Seann William Scott. Johnson plays Beck, a bounty hunter and debt collector who just wants to get out of the business so he can start over and open his own restaurant. His boss, Billy Walker (William Lucking), will only let Beck leave if he takes one last mission to retrieve Walker’s son, Travis Walker (Scott).
Travis turns out to be harder to pin down than Beck hoped for, in part because he’s obsessed with finding a priceless artifact in El Dorado. Despite their differences, Beck and Travis consider forming an alliance against the corrupt owner of a local mine, Cornelius Bernard Hatcher (Dune: Part Two‘s Christopher Walken). The treasure that Travis wants so badly could mean the end of Hatcher’s oppression of the native people. Now, Beck and Travis just have to live long enough to find the artifact without killing each other.
All five of the Die Hard movies are back on Hulu this month, but there will be time to talk about everyone’s favorite Christmas movie later this year. Die Hard with a Vengeance is the best sequel, and a nearly perfect summer action film as well. Bruce Willis is back as NYPD Lieutenant John McClane, and he’s not sure why he’s been roped into a deadly game of Simon Says with a terrorist. However, Simon (Jeremy Irons) quickly demonstrates that his ability and willingness to bomb civilians is very real.
Shop owner Zeus Carver (Samuel L. Jackson) is reluctantly pulled into Simon’s games for McClane when he saves John’s life. Now, McClane and Zeus have to work together to solve Simon’s dangerous riddles and uncover what he’s really after before it’s too late to stop him.
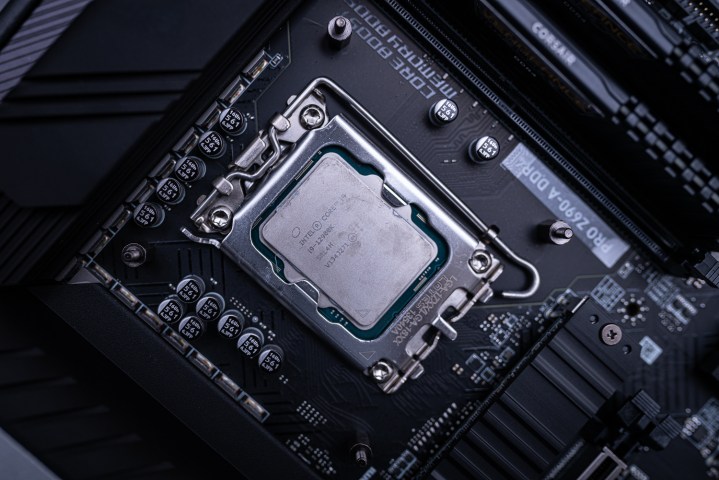
How to undervolt a CPU: Complete guide to undervolting
Undervolting your CPU can be a great way to improve its operating temperatures and reduce its power draw, but if your chip is running too hot and heavy most of the time, undervolting can actually boost its performance too. Intel's top CPUs, like the 13900K and 14900K are prime candidates, but other CPUs can benefit from being undervolted too.
Interested to see how your CPU performs when it isn't redlined with all the power? Here's how to undervolt your CPU in just a few quick steps.
Jacob Roach / Digital Trends
What is CPU undervolting?
Undervolting your CPU refers to the process of lowering the amount of power that your processor receives. On paper, this may not sound like a good idea, but it actually brings more benefits than it brings risks. When done correctly, undervolting can help your processor function well without getting overwhelmed, and this, in turn, affects the performance of your entire computer.
As your CPU draws less power, you gain more than just small savings on your next power bill. Undervolting also lowers the temperatures generated by your processor, may potentially reduce the strain on it over time, and for laptop users, it may have beneficial effects on your battery life.
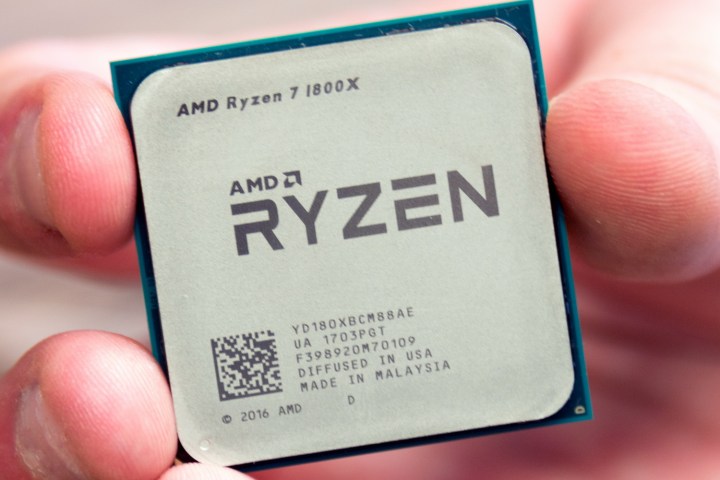
Undervolting is typically mostly done on Intel processors. This is because modern AMD CPUs, such as the Ryzen 5000 series, have a different architecture. As a result, they often have lower power requirements than Intel, to begin with. However, if you have an AMD CPU that is running a little hot, you could still try the steps we will go over below.
The processor is not the only component you can undervolt. You can also undervolt graphics cards (GPU) to achieve similar results — lower power consumption, lower temperatures, and stable performance. It's OK to undervolt both the CPU and the GPU, but this is done separately and in different programs. If you want to tackle that next, check out our guide on undervolting the graphics card.
Undervolting your CPU is a fairly easy process, although at first, it might seem daunting — if only due to the vast number of options available in the software that's most commonly used for it. However, with our guide, anyone can do it.
Image used with permission by copyright holder
Undervolting vs. underclocking vs. overclocking
If you're not very familiar with the term, undervolting may be easy to confuse with underclocking or even overclocking your CPU, but all three of these things are different.
Underclocking refers to lowering your processor's frequency. While this does usually result in lower temperatures and power draw, it doesn't actually do anything good for your computer's performance. As you lower the clock speed, your CPU will be forced to throttle its own performance and won't put out the kind of performance you'd like to see.
Overclocking is the exact opposite of underclocking, meaning you're pushing your computer's clock speed past its base frequency. Most modern processors come with a base frequency and boost/turbo frequency, but overclockers can hit speeds even higher than the advertised numbers. When done correctly, this can improve your processor's performance at the cost of higher power consumption and higher thermals. To some extent, you can undervolt while overclocking, but your mileage may vary.
Overclocking should be done carefully. Not every processor supports overclocking, and you should approach it with a degree of caution on the ones that do support it. We have a handy guide that helps you choose whether you should overclock your CPU, and once you decide to go ahead and do it, make sure to follow our tutorial on how to overclock your processor.
Image used with permission by copyright holder
Is undervolting the CPU safe?
Undervolting your CPU is usually safe. That is not to say that it can't be done wrong, though. If you happen to undervolt your processor too much, your computer may experience instability, crashes, and lowered performance. Most common issues include the blue screen of death (BSOD) and freezes.
Undervolting is a bit of an art form — you should never do too much all at once. It's better to take things step by step and slowly work your way toward a certain voltage than to overdo it and accidentally cause a crash.
Fortunately, undervolting your CPU can easily be reverted if something goes wrong. You'll simply have to redo the steps and adjust the voltage to a slightly higher number until your computer is stable once again.
In many cases, instead of being risky, undervolting is actually the safest thing to do. Laptops and small-form PCs are a good example of why undervolting is helpful. As the components are packed closely together, temperatures are often an issue, and overheating happens all too often. Undervolting your CPU can be one of the ways to address that problem, and if it works, you'll be giving your processor a boost to its lifespan and its performance.
Prepare for undervolting
You're free to try out a few different programs for undervolting, and we'll go over all of them in our full guide below. However, regardless of the method you use to undervolt, the preparation and monitoring will always be the same. In order to know how much you can undervolt your CPU, and to know whether you were able to achieve an improvement, you should first test your processor.
Step 1: Download a benchmarking program. You will use it periodically throughout and after your undervolting attempts.
A good way to test your CPU is to use CPU-Z, but there are other programs that can do this as well, so feel free to use software of your own choice. Make sure that it will be able to put your processor through a stress test.
Step 2: Open up CPU-Z and then move on to downloading another program: HWMonitor. This program will help you keep track of both your temperatures and your voltage while you tinker with it.
Step 3: With HWMonitor running, run your CPU-Z benchmark and take note of the figures that HWMonitor shows.
You want to take special note of the temperatures of all your cores as well as the maximum voltage they reach during the benchmark. It's best to write this down so that you don't forget. This will be your starting point from which you will begin your undervolting journey.
With both programs running, move on to the next section of our guide, in which we will show you all the ways to undervolt your CPU.
How to undervolt your CPU using Throttlestop
If you've decided to give undervolting a try, follow all the steps below to achieve the desired results. All you'll need is a computer with an internet connection to download the program we will use for undervolting. In this section, we'll cover using TechPowerUp's tool called Throttlestop.
Throttlestop mainly works on Intel, but in theory, it should work on AMD too. If you're running into issues on your AMD processor and can't get the program to work, check out our other options below.
Step 1: First, you need to set up Throttlestop. Download it directly from TechPowerUp's website. The program is only available on Windows, and usually, two versions are available: Beta and the latest stable version. It's better to use the stable version if you're unfamiliar with the program.
Unzip the file and run Throttlestop.exe. You will be presented with a warning stating that the software can make significant changes to your CPU. It's true that it can, but we're not going to do anything particularly dangerous, so press OK and proceed.
Step 2: Once you run Throttlestop, you'll see many options as well as an overview of your processor's current temperatures. Unless you've ever tried undervolting before, these settings will be your baseline — this is what your processor came out of the box with.
It's worth noting that as you proceed, you'll be making changes to these settings, but it's quite easy to go back to this initial state.
You can revert the changes at any time by locating your Throttlestop folder and finding the file named "Throttlestop.ini". To go back to your previous settings, simply delete or rename the file, shut down your computer, and then start it up again.
For now, let's undervolt.
Step 3:In the main Throttlestop window, on the left side, locateSpeed Shift - EPPand tick that option. On Intel processors, this enables the Speed Shift technology, also known as Hardware Controlled Performance. It's responsible for improving performance and responsiveness by letting the processor quickly switch to the best voltage/frequency option given the current workload.
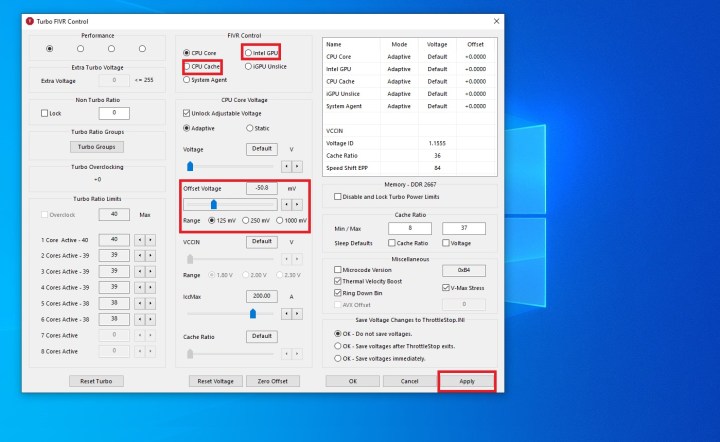
Locate FIVR and press it. This will open up a new window with a whole lot of settings. We're only going to need to tweak a few.
Step 4:In the middle column titled "FIVR Control," locateCPU Core Voltageand tick the first option right underneath:Unlock Adjustable Voltage. Other than that, we're also going to tweak CPU Core, CPU Cache, and Intel GPU. Unsurprisingly, if you're trying to use this program on an AMD processor, this last option may be greyed out or unavailable to you.
Start by ticking some necessary boxes. Make sure CPU Core is selected, and also Adaptive a little under that. The next step will be to start undervolting.
Step 5:In order to undervolt your CPU, you need to adjust theOffset Voltage. You should be doing this in small increments and the final amount depends on your processor. Older CPUs can struggle with a bigger undervolt. Meanwhile, modern processors such asIntel Alder Lakeand similar generations can handle a bigger power adjustment, especially seeing as they consume a whole lot more power in the first place.
You can start by adjusting the millivolt (mV) value by a larger amount. This will depend on your chip, but -50mV should be a safe starting point. If your PC proves to function well with that, you can go back and redo these steps to lower the voltage even further.
Once you've adjusted the offset voltage, switch the selection at the top to CPU Cache and adjust the undervolt to the same value as CPU Core. Lastly, pick Intel GPU and undervolt it slightly if you want: Anywhere in the 25-50mV range should be fine. However, it's OK to skip Intel GPU if you experience stability issues later on, as it doesn't do very much for your temperatures and voltage compared to the other settings.
Once you've adjusted everything, press Apply. If your computer doesn't immediately crash (which can happen, but don't worry if it does — you'll just have to go easy on it next time), you should also select OK - Save Voltages Immediately and click Apply once again.
Step 6:It's time to put your new voltages to the test and see whether your laptop or desktop remains stable when undervolted.
Run your CPU-Z benchmark and watch the temperatures/voltages in HWMonitor carefully. Compare these values to the ones you achieved prior to undervolting. You should already see an improvement.
If your computer makes it through the benchmark without crashing, you can perform a few more quick tests to ensure everything is fine: * If you're using a laptop, run the benchmark with the laptop unplugged (using up battery life) * Restart the computer, put it to sleep, and wake it up * Run every piece of software you usually have open. If you tend to play games while using Discord and Google Chrome, do that, but make sure you're doing a lot of it — really try to stress your PC.
Assuming everything went fine, you can go back and repeat the above steps. This time, undervolt in smaller 5-10mV increments. You'll eventually hit a wall and start experiencing crashes as you test your computer (or even before that point). This means it's time to go back, bring your voltage slightly higher, and stick to the last point where everything was stable even when your computer was performing at 100%.
Step 7: This is an optional step that only applies to laptop users. However, if you're on a desktop, you can consider doing this too if you feel you have any need for it.
You might want to set up two profiles for your Throttlestop: One for when your computer is plugged into the wall socket and one when you're running on battery. As mentioned above, these undervolting values may be different and you may have to scale up or down depending on whether you're plugged in or not. As such, it's useful to have two different profiles to make sure you're undervolting correctly.
You can set up the profiles by going back to the main Throttlestop window and clicking Options. Desktop users might want to do this for various reasons, but mostly, this applies to laptop users with a concern for their battery life.
In Options, on the right-hand side, you'll find AC Profile and Battery Profile. Tick both boxes. Leave your AC Profile as number one and adjust your Battery Profile to number two. Click OK to save. Throttlestop will automatically adjust these profiles based on whether your computer is plugged in or not.
Now, when you go back into FIVR, you'll be able to choose settings for each profile. Your AC Profile should be the one with the highest performance and the lowest undervolt. For your Battery Life profile, you can and should undervolt as much as possible in order to save battery life.
Step 8:For all its virtues, Throttlestop does have some flaws. To name one, it doesn't automatically run these profiles when you start up your PC again. It also stays in the taskbar instead of the notification area unless you change a couple of settings. In this final step, you'll set up Throttlestop to be always on, but minimized.
In the main Throttlestop window, click on Task Bar on the left side. Next, access Options, and select Start Minimized. Lastly, select Minimize on Close, and save with OK.
To make sure Throttlestop is on whenever you power up your PC, you'll need to play with some Windows settings instead of the app itself. To do so, click the Windows logo on your taskbar or press the Windows key on your keyboard. Type in Task Scheduler into the search bar. Right-click the app and select Run As Administrator.
In the Windows Task Scheduler, navigate to Create Basic Task on the right-hand side. Name it Throttlestop and click Next when you're ready.
On the left-hand side, click on Trigger. Choose When I Log On. Click Next and switch to Action, then select Start A Program, and navigate to your Throttlestop.exe file. Click Open. Select the option that will make it so that the properties dialogue for the task will open when you click Finish.
Enter Properties and make sure you select Run With Highest Privileges. Click OK to save. From now on, Throttlestop will open at startup and execute these settings each and every time.
How to undervolt your CPU with AMD Ryzen Master
If you own an AMD processor, Throttlestop may not work for you. Fortunately, you can still undervolt your processor if you so wish, but you'll have to use a different program: AMD Ryzen Master. You can download it directly from AMD.
Before you download it and try to undervolt your processor, make sure that your CPU is supported. Any processor older than the Ryzen 2000 series will not work with this program. In addition, if you're using a laptop equipped with an APU, you won't be able to use this either.
AMD Ryzen Master is a program that lets you overclock, adjust power modes, overclock the integrated GPU, stress test your CPU and RAM, and more. Undervolting in AMD Ryzen Master is an intuitive process, and it's a fair deal less scary than overclocking.
Step 1: In the main Ryzen Master screen, navigate toward the bottom-left corner and switch to Basic View. You can play around with the settings in this full overview, but Basic Mode gives you access to what you need: CPU voltage. You can also switch between profiles if you'd like to have separate settings for each one.
AMD
Step 2: From here, undervolting is easy. Open up CPU-Z and HWMonitor, check your current voltages and temperatures while running a CPU benchmark, and write down the values.
Go back into Ryzen Master and try to lower the CPU Voltage (Volt) value. Much like with Throttlestop, you can start bigger with -50mV. Click Apply & Test to check whether this voltage works for your PC. You should also test it for yourself by running the benchmark yet again, tracking voltage and temperatures, and keeping a keen eye out for any crashes.
If the new setting works out, go back in and lower it in 5-10mV increments until you're starting to experience issues or you're satisfied with it. Click Apply & Test after each attempt and run all your tests to make sure the voltage is actually sustainable under duress.
Once you're all done, you won't have to re-apply these settings each time. They will stay this way until you decide to change them. You can always reset the settings by clicking Default in the top-right corner of the AMD Ryzen Master Basic View.
Keeping an eye on your CPU's temperatures is an important step in undervolting and overclocking. For more help on monitoring your processor, check out our guide on how to check your CPU temperature.
The Google Pixel 8a (left) and Pixel 6aDigital Trends
Ahead of Google I/O 2024, Google revealed the latest entry in the Pixel lineup: the Google Pixel 8a. This budget-friendly Pixel option is packed with plenty of new features, including a new design and colors, the Tensor G3 chip, more storage, and a crop of new AI-powered tools.
But what if you still have a Google Pixel 6a? Are all of these new features worth an upgrade? Let’s examine both phones to help you make an informed decision.
Google Pixel 8a vs. Pixel 6a: specs
Google Pixel 8a
Google Pixel 6a
Size
152.1 x 72.7 x 8.9 depth mm (6.0 x 2.9 x 0.4 inches)
152.2 x 71.8 x 8.9 mm (5.99 x 2.83 x 0.35 inches)
Weight
188 g (6.8 ounces)
178 grams (6.28 ounces)
Screen size
6.1 inch OLED
6.1-inch OLED
Screen resolution
2400 x 1080 pixels (430 pixels per inch), 120Hz. 2,000 nits peak brightness
2400 x 1080 pixels (429 pixels per inch), 60Hz, 876 nits peak brightness
Operating system and updates
Android 14 w/seven years of OS, security, and Feature Drop updates
Android 12 w/three years of OS updates, five years of security updates.
Storage
128GB or 256GB
128GB
MicroSD card slot
No
No
Processor
Google Tensor G3/Titan M2 security coprocessor
Google Tensor G1/Titan M2 security coprocessor
RAM
8GB
6GB
Camera
64MP main camera, 13MP ultrawide camera, 13MP front camera
12.2MP main camera, 12MP ultrawide camera, 8MP front camera
Video
Up to 4K at 60 frames per second (fps)
Up to 4K at 60 frames per second (fps)
Bluetooth version
Bluetooth 5.3
Bluetooth 5.2
Ports
USB-C
USB-C
Fingerprint sensor
Yes, in-display
Yes, in-display
Water resistance
IP67
IP67
Battery
4,492mAh
18W wired charging
7,5W wireless charging (Qi-certified)
4,410mAh
18W wired charging
No wireless charging
Colors
Obsidian, Porcelain, Bay, Aloe
Chalk, Charcoal, Sage
Price
From $499
$449 (at release)
Pixel 8a vs. Pixel 6a: design, display, durability
Since the Google Pixel 6 series, the Pixel lineup has retained the same overall aesthetic, with a few minor tweaks in design.
Both the Pixel 6a and Pixel 8a have the same general appearance, but when you look closer, there are definite changes in design. The Pixel 8a features much more rounded and softer corners on the chassis, whereas the Pixel 6a has more traditional square corners. The camera bar on the back of the Pixel 8a is also aluminum now, instead of plastic like on the Pixel 6a, so it looks more natural when extending into the aluminum frame.
You also get more color options with the Pixel 8a, as it comes in Aloe (green), Bay (blue), Obsidian (black), and Porcelain (white). The Pixel 6a only comes in three colors: Chalk, Charcoal, and Sage.
Both the Pixel 6a and Pixel 8a have a 6.1-inch OLED display with 1080 x 2400 pixel resolution, 430 pixels-per-inch density, and always-on capabilities.
However, the Pixel 8a has double the refresh rate at 120Hz compared to the Pixel 6a’s measly 60Hz. This means you’ll get much smoother scrolling and animations, and using apps in general will be a much better experience. The Pixel 8a display will also reach up to 2,000 nits of peak brightness, which is much better than the Pixel 6a’s maximum of about 876 nits.
In terms of durability, both the Pixel 6a and Pixel 8a use Corning Gorilla Glass 3 and have an IP67 rating for dust and water resistance.
Pixel 8a vs. Pixel 6a: performance, battery life, and charging
When you’re considering a new smartphone, it’s always important to take a look at how they perform. In the case of the Pixel 8a and Pixel 6a, there’s a pretty big difference here.
The Pixel 8a uses the newest Google Tensor G3 chip with Google’s Titan M2 security coprocessor, the same one that you’ll also find in the mainline Pixel 8 and Pixel 8 Pro. The Pixel 6a uses the first-generation Google Tensor G1 chip, which isn’t a bad chip, but it is a bit dated compared to the new G3.
The Pixel 6a also only had one storage option: 128GB with 6GB RAM. The Pixel 8a has two: 128GB or 256GB, and both options have 8GB RAM. The extra RAM pairs nicely with the improved performance and efficiency of the G3 chip.
Google
The batteries on the Pixel 6a and Pixel 8a are similar, at 4,410mAh and 4,492mAh, respectively. So, you do get a bigger battery with the Pixel 8a, and with the performance and power efficiency of the newer G3 chip, that should also mean more battery life.
Unfortunately, charging has remained unchanged. The Pixel 8a still only has 18-watt wired charging like the Pixel 6a. However, the Pixel 8a does support 7.5W wireless charging, while the Pixel 6a lacks wireless support entirely. (The Pixel 7a was the first Pixel A-series phone to have wireless charging support.)
Pixel 8a vs. Pixel 6a: cameras
Joe Maring / Digital Trends
Google Pixel phones have a solid reputation for taking good photos, but the hardware still matters. And the difference between the Pixel 6a and Pixel 8a is quite significant.
The Pixel 6a just has a 12.2MP main camera with a 12MP ultrawide lens, as well as an 8MP selfie camera. But the Pixel 8a features a big jump up to 64MP main camera with a 13MP ultrawide lens, and the selfie camera is 13MP.
Though the Pixel 6a still takes good photos, the Pixel 8a definitely has better specs that will result in even better photos. With a massive jump in megapixels for the main camera, your shots will have much more resolution and detail, which is better if you ever plan to print out your photos.
The Pixel 8a also has better software tools for helping you get the best photo possible, including Best Take and Magic Editor, which are possible here due to the better performance of the G3 chip. Best Take lets you take multiple group photos and then combine the best faces from each one into a single photo. Magic Editor lets you enhance your photos with various AI-powered filters and effects.
But the Pixel 6a isn’t without some AI magic of its own. The Pixel 6a still has the Magic Eraser tool, which lets you get rid of unwanted objects in a photo.
Pixel 8a vs. Pixel 6a: software and support
Joe Maring / Digital Trends
Another important thing to consider when getting a new phone is how long the hardware and software will be supported. After all, not everyone buys a new phone every year, right?
The Pixel 6a came out in 2022 and shipped with Android 12. At the time, Google promised three years of Android OS upgrades and five years of security updates. This means that the Pixel 6a will last through Android 15, which should come out later this year.
The Google Pixel 8a ships with Android 14, and Google has upped the ante with seven years of support across the board, just like with the main Pixel 8 and Pixel 8 Pro. So, the Pixel 8a will last through Android 21. This is also the first Android phone that will have Gemini Nano AI capabilities for under $500.
Pixel 8a vs. Pixel 6a: price and availability
Google
Since the Google Pixel 6a is an older phone, you can’t buy it from the Google Store anymore. However, retailers like Amazon still seem to have some stock left, with prices under $300. While this may sound like a good deal, remember that it won’t be supported for much longer at this point.
The Pixel 8a is available now, starting at $499 for the 128GB version and $559 for the 256GB model. You can also save some money on a Pixel 8a by looking for special trade-in deals and other sales.
Pixel 8a vs. Pixel 6a: is it worth upgrading?
Joe Maring / Digital Trends
It’s pretty clear that the Pixel 8a is a big upgrade over the Pixel 6a. Considering that the Pixel 6a is getting close to the end of its life at this point, it would be a good time to upgrade, and the Pixel 8a is a fantastic choice.
The Pixel 8a has a new design and colors, and the 120Hz refresh rate on the 6.1-inch OLED display provides a much better experience than the 60Hz on the 6a. With a maximum brightness of up to 2,000 nits, the Pixel 8a is also much easier to use outdoors in bright sunlight.
For photography and video, the Pixel 8a will definitely impress with its 64MP main camera, 13MP ultrawide lens, and 13MP selfie camera. This is almost as good as the regular Pixel 8 and Pixel 8 Pro, and it’s a huge step up from the Pixel 6a. And with cool AI features like Best Take and Magic Editor, getting the best photos is a breeze.
The Tensor G3 is also much improved over the first two iterations of the chip and even has less tendency to overheat. The slightly larger battery will get you through the day better, and you even have wireless charging. The Google Pixel 8a comes with Android 14 and will be supported through seven years of Android updates, so this phone will definitely last a while.
The Pixel 8a is easily one of the best value budget handsets this year. If you’re still holding on to your Pixel 6a, you should definitely consider upgrading this year.
It is a long established fact that a reader will be distracted by the readable content of a page when looking at its layout. The point of using Lorem Ipsum is that it has a more-or-less normal distribution of letters, as opposed to using 'Content here, content here'.
Increased & Evolving Threat
Lorem Ipsum is simply dummy text of the printing and typesetting industry.
Widening Attack Surface
Lorem Ipsum is simply dummy text of the printing and typesetting industry.


.jpeg)
